
Monday, November 2, 2015
Monday, October 19, 2015
Saturday, August 8, 2015
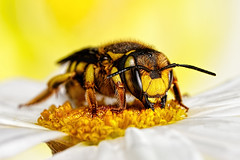
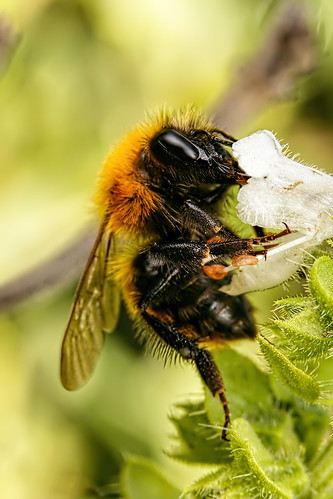
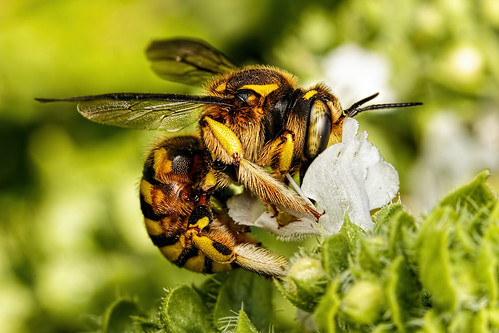
Bumbleebees in Basil
On the hardware side: If you want to keep the background from being black then you pretty much need the sun behind you, and you need to shoot no higher than 2x. As the magnification goes up the amount of available surface area in the background drops, so you'll quickly reach a point where you'll have to set the shutter too slow, ISO too high, and or the Fstop too low. I've found a pretty good balance with my camera set to 1/60, ISO 200, and F11. Then all I have to do is adjust the FEC, usually setting it at about -1. The key is to dial in your camera settings, cast a shadow over and focus on a flower you've baited, and take a shot with the flash off. If you've got some color and detail in the background, and as long as it's not over exposed and the flower is nearly black, then you should be good to go. As long as the flower is horribly under exposed with the flash turned off, then the flash will be the only significant light source on the subject when its turned on. So it's the flash, and not the shutter, that's going to freeze the motion in the scene (just like shooting macro with the flash as the only light source). Set your flash to second curtain sync just in case you do get some motion from the natural light (it will freeze the area in motion right before the shutter closes, giving you detail in that area even though there was movement).
Get happy with the delete key on the keyboard -this is not studio shooting...
Thursday, August 6, 2015
Featured by Distinctly Average
Sunday, August 2, 2015
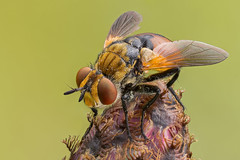
Bee-Havior Part 3
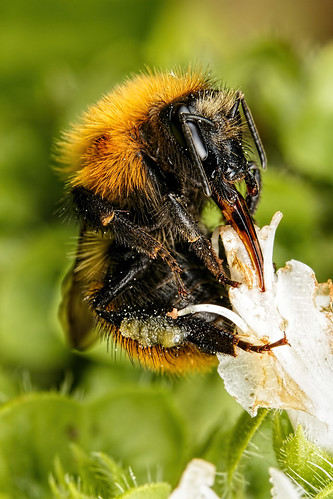
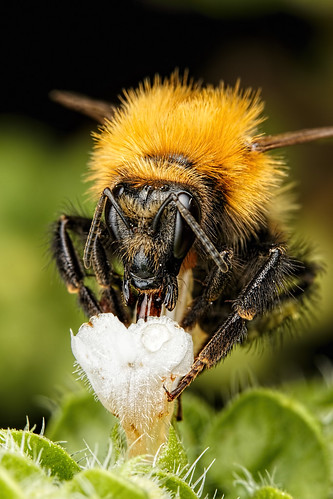
Bees have a tendency to pull away from me, and I used that behavior to my advantage for this next shot. A head on shot looking down into the flower got stuck in my head after one session of shooting feeding bees. But I knew that the limited depth of field, even at F16, was going to be problematic. But positioning myself over the top of this bumblebee caused it to pull away from the flower, allowing me to place the thin flat area of acceptable focus over the proboscis all the way to its eyes and head.
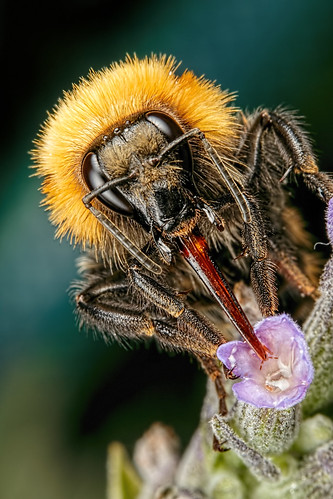
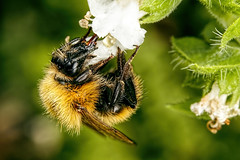
On mixing natural light and flash: Changing the sensitivity of your sensor (the ISO) or the amount of light coming into the lens (the Fstop) will effect both the natural light and the flash in a scene. But as long as you stay below the maximum flash sync speed for your camera the shutter will only impact the natural light. So the “trick” that I’m using with images like this next one is to lower the shutter speed so I can use natural light to expose the background, and since I’m deliberately shading the subject the flash can still freeze what little motion is left to give me sharp details in the subject. I don’t care about motion causing the background to blur since it will be out of focus anyway.
This is the last post in this series. I have some more behavioral info, and well as a lot to say about composition. But I’m going to save it for my next book (hopefully get it out this fall). Until next time happy shooting :)
Monday, May 25, 2015
Bee-Havior Part 2
When I first got into macro photography I ran into a lot of bad advice, and one misconception that I still see people buying into even today is that you need long glass to shoot skittish or active subjects. Now I’m not saying that’s completely false, there are some critters that you may need a lens in the 150mm plus range to photograph. But that really only holds true if you’re using natural light, and the subject is very skittish. But if you’re using a flash as your primary light source then you need to get your diffusers close to the subject to get really well diffused light, and if your diffusers are close then the working distance of the lens is kinda mute. Add to that the need for a completely calm day with little or no wind when working with long glass and you’ll find yourself limited to what you can do, and when you can do it, when using a big lens.
So what does all of that have to do with shooting bees? Well, what if I told you that one of my “secrets” to taking images of them above life size is to use a short focal length lens and go looking for them on windy days. In fact the windier the day the easier it is to get close to them, because they can’t tell the difference in the vibration caused by the breeze and me grabbing onto the stem of the flower that they are on. Once I have that stem between my left index finger and thumb I rest the lens on that same hand. Now the subject and the camera are on the same “platform” and I have almost full control over the motion in the scene, and I can turn the flower and twist the camera to make the most of what little depth of field there is in a single frame macro image. If I’m really lucky then the skies are partly cloudy and the critters are used to the occasional drop in light, so they’re not concerned when I cast a shadow over them. So although it sounds really counterintuitive it’s sometimes best to use a short focal length lens and go shooting on a windy day :)
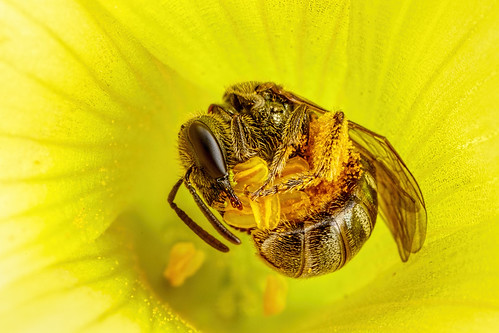
I also like to go shooting active subjects early in the morning for two reasons. The first is that they are still trying to get moving and they may just be active and not hyperactive. The other is that they are just like us in that they really need breakfast. So the hungrier they are the more likely they’ll put up with me getting close to them. Later in the day, when there’re not so concerned with eating, it’s going to be more difficult.
Until next time happy shooting :)
Tuesday, May 19, 2015
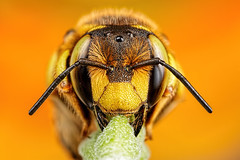
Daily Deviation Number 8
I just received my eight Daily Deviation at Deviant Art for this image:
El Torro by dalantech on DeviantArt
El Torro by dalantech on DeviantArt
Saturday, May 16, 2015
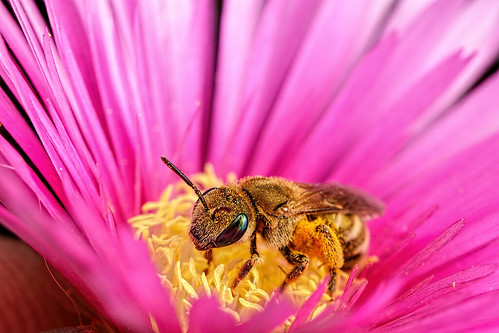
Bee-Havior Part 1
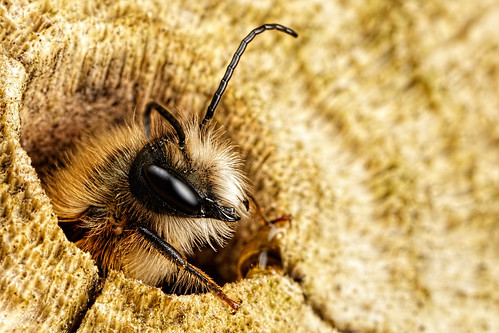
For the past two years I've had a solitary bee house hanging from a wall at the back of my house, in one of the few places that I had space for one, but the location didn't work. Too many other insects tried to make it a home, and it didn't get any early morning sunlight which is critical for nesting solitary bees. They need the heat of the sun to kick start their metabolism, so they want to nest in areas that get warm early. That's why some Mason Bees built a nesting site in the dead limbs of a tree in my back yard. Here's a male Mason Bee that I photographed shortly after he had hatched out of that nest:
So not long after I took that shot I took the bee house down from the wall and set it on my patio table and cleaned it out (some Earwigs had invaded it). But before I could put it back together a female Mason bee had found the nesting block and had started building egg chambers in it. So after seeing her exit the nesting block I sunk a wood screw into the same tree that the Mason's had built their nest and I hung up the bee house.
The female Mason bee kept coming back to my patio table looking for the bee house...
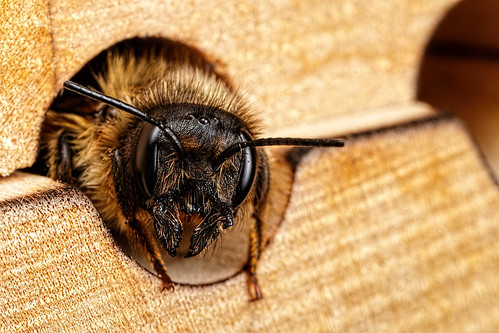
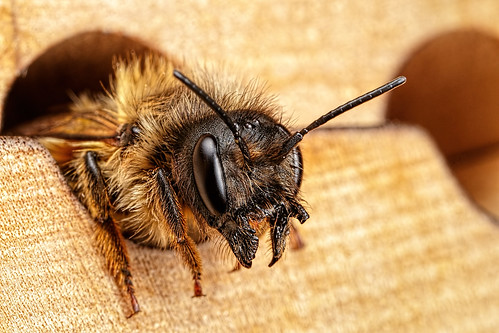
Not to be outdone by an insect I got an idea: I took the bee house down from the tree, set it back on my patio table, and waited for the Mason bee to go into it. When she did I very slowly picked up the bee house, carried it across the yard, and hung it back on the tree. When she came out she must have imprinted the new location in her mind because she stopped coming to my patio table and is still building out brood cells in the bee house :) Here's the only frame that she has allowed me to take of her so far:
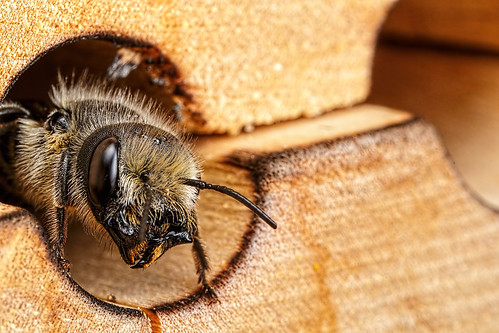
Getting that single frame was tough. I camped out in front of the bee house before sunrise and spent almost two hours trying to acclimate the Mason bees to me and the camera. If they see you move as they are trying to get active they will go back to being dormant. It's like they have a random number generator in their heads and for several minutes they'll just go back to sleep. If you have the camera close to them while they are dormant then they won't notice it when they wake up -they'll think that it's just a part of the scenery. But be warned: Once they are acclimated to you and the camera they will get active very quickly. Once that Mason Bee stuck her head outside of the bee house I had about a minute to photograph her, and as you can see she wasn't sitting still.
As of this blog post I have two Leaf Cutter bees building brood cells in my bee house, with one chamber completely full and another one that's almost done. Even if you're not into macro photography it's a good idea to set up a solitary bee house. They are excellent pollinators and they are also very timid!
Until next time happy shooting :)
So not long after I took that shot I took the bee house down from the wall and set it on my patio table and cleaned it out (some Earwigs had invaded it). But before I could put it back together a female Mason bee had found the nesting block and had started building egg chambers in it. So after seeing her exit the nesting block I sunk a wood screw into the same tree that the Mason's had built their nest and I hung up the bee house.
The female Mason bee kept coming back to my patio table looking for the bee house...
Not to be outdone by an insect I got an idea: I took the bee house down from the tree, set it back on my patio table, and waited for the Mason bee to go into it. When she did I very slowly picked up the bee house, carried it across the yard, and hung it back on the tree. When she came out she must have imprinted the new location in her mind because she stopped coming to my patio table and is still building out brood cells in the bee house :) Here's the only frame that she has allowed me to take of her so far:
Getting that single frame was tough. I camped out in front of the bee house before sunrise and spent almost two hours trying to acclimate the Mason bees to me and the camera. If they see you move as they are trying to get active they will go back to being dormant. It's like they have a random number generator in their heads and for several minutes they'll just go back to sleep. If you have the camera close to them while they are dormant then they won't notice it when they wake up -they'll think that it's just a part of the scenery. But be warned: Once they are acclimated to you and the camera they will get active very quickly. Once that Mason Bee stuck her head outside of the bee house I had about a minute to photograph her, and as you can see she wasn't sitting still.
As of this blog post I have two Leaf Cutter bees building brood cells in my bee house, with one chamber completely full and another one that's almost done. Even if you're not into macro photography it's a good idea to set up a solitary bee house. They are excellent pollinators and they are also very timid!
Until next time happy shooting :)
Wednesday, April 8, 2015
Nationa Geographic's Daily Dozen
Monday, February 16, 2015
Stacking Done Right
...and I have to admit that the detail in this shot is a part of what makes it stand out...
I'm not so sure that the image had to be taken at F4.5 to get that level of detail, pretty sure that F8 would have worked just fine at 1.8x and Andrea wouldn't have to take 85 frames at that Fstop, but the detail when added to a well lit and well composed scene makes for a spectacular image! Well done Andrea -you've definitely set the bar high with your macro photography!
One of the benefits of linking my blog to my Google Plus account is that when I blog I can also announce the post on my Google Plus page. In response to this post David Elefante brought this video by John Hallmen to my attention that might help some of you deal with those pesky antenna that just don't seem to sit still.
For those of you who do not know John Hallmen it's my honor and privilege to introduce you to his work!
Friday, February 13, 2015
Explaining Diffraction
Sadly a lot of you are going to view this video and use it as an excuse to focus stack. But as a macro photographer who routinely shoots single frames with a macro lens stopped down to F16 this video reconfirms what I've been saying for years -diffraction is not the devil that the macro community has made it out to be...
There are so many factors that can impact image sharpness that blaming all of the softness in your photos on diffraction, IMHO, shows a great deal of inexperience.
Saturday, January 24, 2015
Working on a New Diffuser
I built a second model that had just a few minor improvements over the prototype, and after I finished it realized that what I need is something modular that I can take apart, change out diffusion materials, and reassemble. So I went through my son's Legos, determined what plates I'd need to build a diffuser, and ordered the pieces from the Lego online store. I'm still waiting for the order to arrive, but when it does I expect to have a diffuser set that not only works better than what I have now but I'll also be able to rapidly make changes to it. As it stands now every time I want to experiment with some new plastic I have to build a new diffuser, and it's just too time consuming and expensive.
Subscribe to:
Posts (Atom)